Casper Manikin Lung Change
Want to watch this video? Sign up for the course
or click below to watch one free video.
Unlock This Video Now for FREE
This video is normally available to paying customers. Click below for instant access.
Changing Lungs in Casper CPR Manikins - Step-by-Step Guide
Introduction
Learn how to quickly and efficiently change the lungs in your Casper CPR Manikins to ensure smooth training sessions for your students.
Step-by-Step Guide
Follow these steps to replace the lungs in your Casper CPR Manikins:
- Remove the Cover: Begin by removing the cover that holds the foam in place.
- Take Out the Foam Pad: Remove the foam pad temporarily.
- Prepare the Coat Hanger: Use a thin coat hanger with modifications:
- Cut off the hook part, leaving a folded loop on one end for easy handling.
- Fold the other end slightly and tape it securely to avoid any damage to the manikin.
- Insert the Lung Bag: The lung bag has an open end and a sealed end; ensure the open end is positioned correctly by the nose.
- Thread the Bag: Insert the coat hanger through the nose and pull the lung bag through carefully, ensuring there are no twists.
- Reassemble: Once the lung bag is in place, replace the foam pad, cover, and secure the plastic cover.
- Final Checks: Ensure the plastic bag covers the nose and tongue, allowing for proper airway simulation.
Additional Tips
Encourage students to remove and dispose of used lung bags properly to maintain hygiene during training sessions.
Contact Us
For purchasing Casper CPR Manikins or any inquiries, visit first-aid-online.co.uk or call us at 01206 805380.
Recommended Products For You

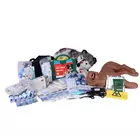
Advanced Pet First Aid Kit
£19.95 + VAT

Casper Lung Pack of 100
£50.00 + VAT

Casper CPR Dog
£399.99 + VAT
Pet First Aid Plus Instructor Kit
£725.00 + VAT

Pet First Aid Kit
£12.50 + VAT

Pet First Aid Kit for Instructors
£140.00 + VAT